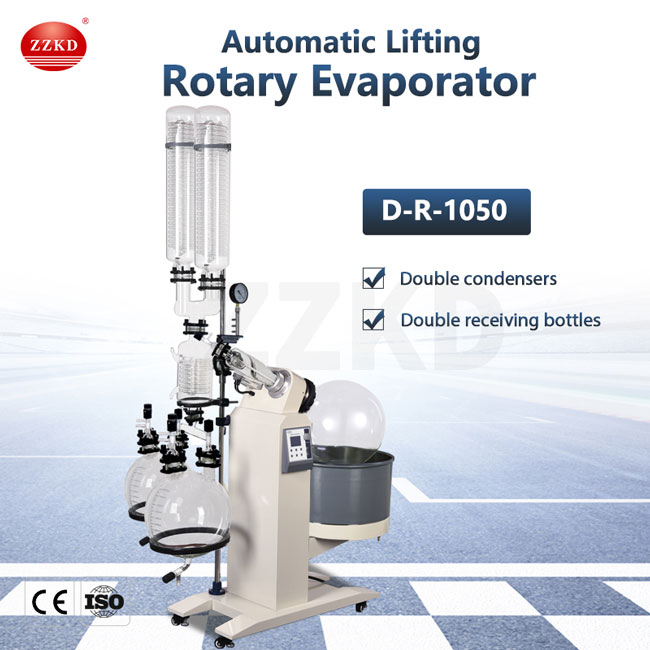
Rotary Evaporator Installationr And Instructions

Rotary evaporator installationr:
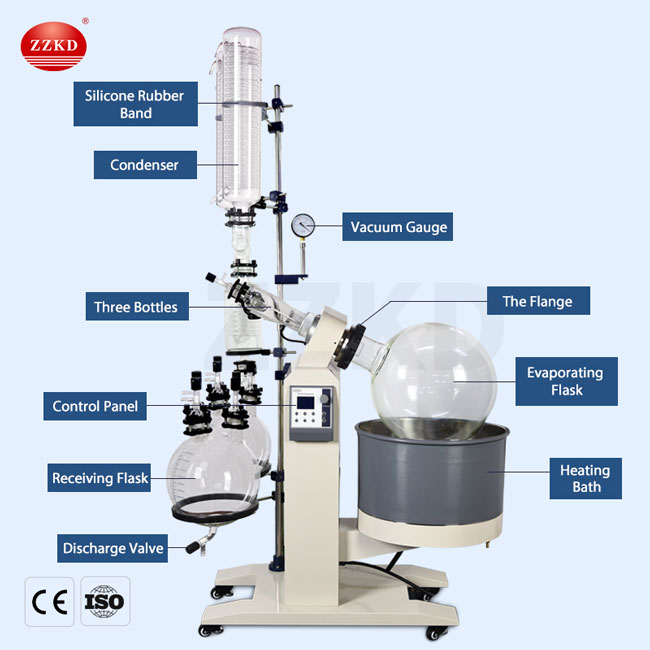
Assemble Rotovap
●Remove all packing round coils with compressed air and/or appropriate solvents, clean and make unit close to sterile.
●Make certain rotovap is positioned on a flat, degree floor, and utilizes an appropriately rated electrical circuit.
●If additional meeting help is needed, video walk-throughs can be found on YouTube.
Connect Chiller
●Connect cold output line from chiller, to prime port of lower-condenser coil.
●Connect coolant output from lower-condenser coil, to high port of upper-condenser coil.
●Connect output of upper-condenser coil, to chiller return port.
Configure Vacuum System
●Connect vacuum strains from rotovap vacuum manifold, to discharge flask high valve and prime port of upper-condenser physique.
●Connect vacuum line from vacuum manifold, to ZZKD Research CT-1 cold trap.
●Connect CT-1 cold entice output port, to ZZKD Research SVC-1 vacuum controller port labeled 'System'.
●Connect vacuum pump to SVC-1 controller port labeled 'Vacuum Pump'.
Operating Steps:
Warmup
●Turn on rotovap, set water bath temperature from 35 to 75°C.
●Turn on chiller, set temperature from 0 to 5°C.Set SVC-1 vacuum controller to proper outside expected solvent evaporation level (generally seventy five Torr or 100 mbar)
●Turn on vacuum pump and begin system pump-down.
●Allow chiller, water tub, and vacuum pump to achieve their set points earlier than proceeding.
Initial Operation
●After gear has equalized, turn on rotation and set speed between 25 and 130 RPM.
●Adjust vacuum set-point 15-20% lower.
●Feed in small quantity of solvent resolution:
a. mini rotary evaporator — ~100ml
b. 10 liter rotovap — 100-200ml
c. 20 liter rotovap — 200-500ml
Note: As evaporation begins, watch the condenser/discharge aspect to get a sense of your solvent restoration price.
●Slowly feed solvent solution into rotovap and match solvent feed fee, to rotovap discharge price.
●Reduce feed price by 1-3%. You want roughly 1.5% more popping out, than stepping into.
Fine Tuning
After system is feeding and working, set the ZZKD SVC-1 vacuum controller set-point as low as you can, while watching each the condenser and the CT-1 cold entice for vapor. Adjust vacuum so that vapor stays in the rotovap and does not exit via the condenser vacuum port.
Note: Ramping down vacuum ought to be done only after initial operation is accomplished. The cause is increasing vacuum can increase warmth masses exponentially to the chilling system if carried out improperly.
●Ensure feed line is repeatedly pulling solvent resolution from bottle at acceptable rate; replace bottle as needed. Also maintain CT-1 cold lure full of dry ice and most popular solvent.
●Empty solvent discharge ball at backside of rotovap condenser as needed via course of. Only empty evaporation ball as wanted.
This process is called batch-feeding and could be run nonstop till the specified quantity of fabric is within the evaporation ball. You will be ready to obtain the quickest recovery occasions possible with these methods. Running on this configuration requires a strong understanding of tips on how to function continuous and skill to correctly match up system components.
Note: Please know that with mismatched tools, any weak or inefficient hardware will both overheat, or cease working properly. ZZKD Research has accomplished a terrific job at pioneering this course of and matching appropriate elements with gear and buyer requirements. If you require even faster speeds, please contact us to debate custom options we provide to large-scale labs.

Rotary evaporator instructions:
Increase Evaporation Rate
●Fill a 5-gallon bucket with water, ideally sizzling.
●Place a 25 foot, 3/8" OD, thin-wall stainless coil (commonly known as a wort chiller) into the bucket.
●Attach an 800 watt (or stronger) sous-vide heater to the bucket and guarantee unit is submerged and water is saved at applicable degree.
●Set sous-vide heater between 50 to 75°C.
●Feed solvent resolution via the heated coil earlier than it enters the rotovap to greatly assist in rotary evaporation. This also decreases load on the water bath heating components.
Boost Chiller Performance
●Fill a 5-gallon bucket approximately 30% full with water, preferably chilly.
Place a 25 foot, 3/8" OD, thin-wall stainless coil (commonly referred to as a wort chiller) into the bucket.
●Fill the rest of bucket with wet ice (water ice).
●Attach rotovap condenser coolant output to one side of stainless coil.
●Attach other side of stainless coil to chiller return port. This significantly lowers the load on the chiller, allowing increased vacuum and sooner evaporation.
Reduce Leaks
●Apply food-grade silicone vacuum grease to all O-rings and gaskets whereas assembling the rotovap. This will scale back the load on the pump and might help facilitate reaching even decrease vacuum set factors, rising output.
Questions about rotary evaporation or more advanced processes? Please go to the Resources page from our website or contact us. We love when prospects go to our showroom in Scotts Valley to view the latest, best improvements & exclusive gear provides. ZZKD Laboratory Supply


